Custom Annotation Markers
This feature is limited to Pro & Business accounts only.
Custom Annotation Markers enable you to create your own icon images as Annotation Markers. This allows you to use icons and markers that are more appropriate for your use cases. They can also be used as markers on Plan Drawings.
Getting Started
Creating Custom Annotation Markers
There are two ways you can add Custom Markers: by selecting from a preselected set of icons that we have included, or by uploading your own assets.
You can add a marker from two places:
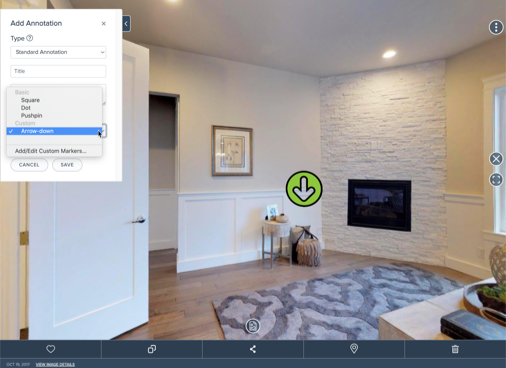
- Create/Edit Annotation panel: You can add a marker from the annotation marker dropdown in the Create/Edit Annotation panel; select the "Add/Edit Custom Markers" option.
- Account Details page: You can also add markers from your Account page: Scroll down to the Customizations section; under Annotations click the "Manage Annotation Markers" link.
Creating Custom Marker via Preselected Icons
Momento360 has a set of icons that you are free to use to create your own Custom Markers. To do this, select the "Pick an Icon" option in the Create Custom Marker wizard.
1. Select Icon
First you will select the icon to base the marker on. (Note that colors will be set in the next step).
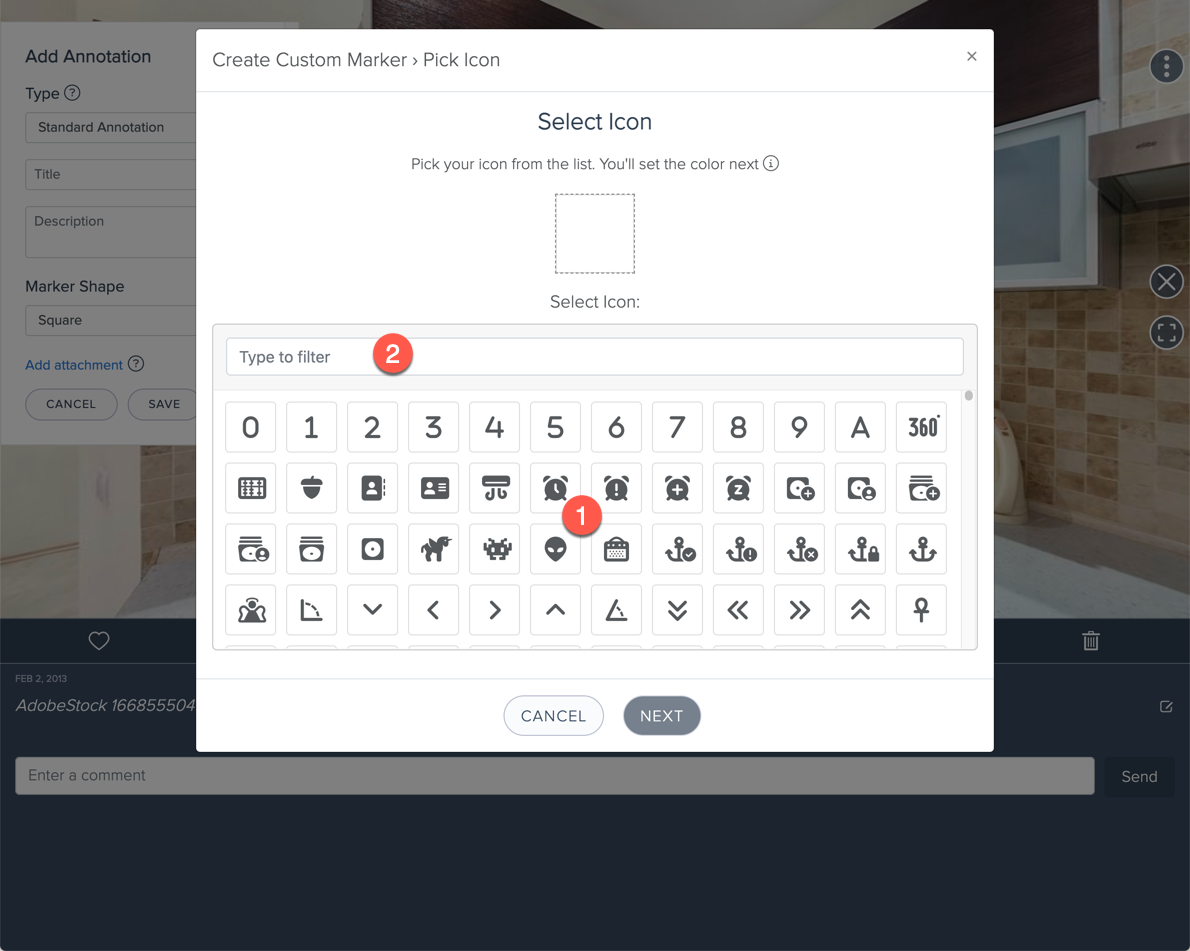
The icon selector will display. You can 1) scroll through the list of icons, or 2) type in what you are looking for to filter the displayed set.
Click on the icon you want and it will display in the blank area at top:
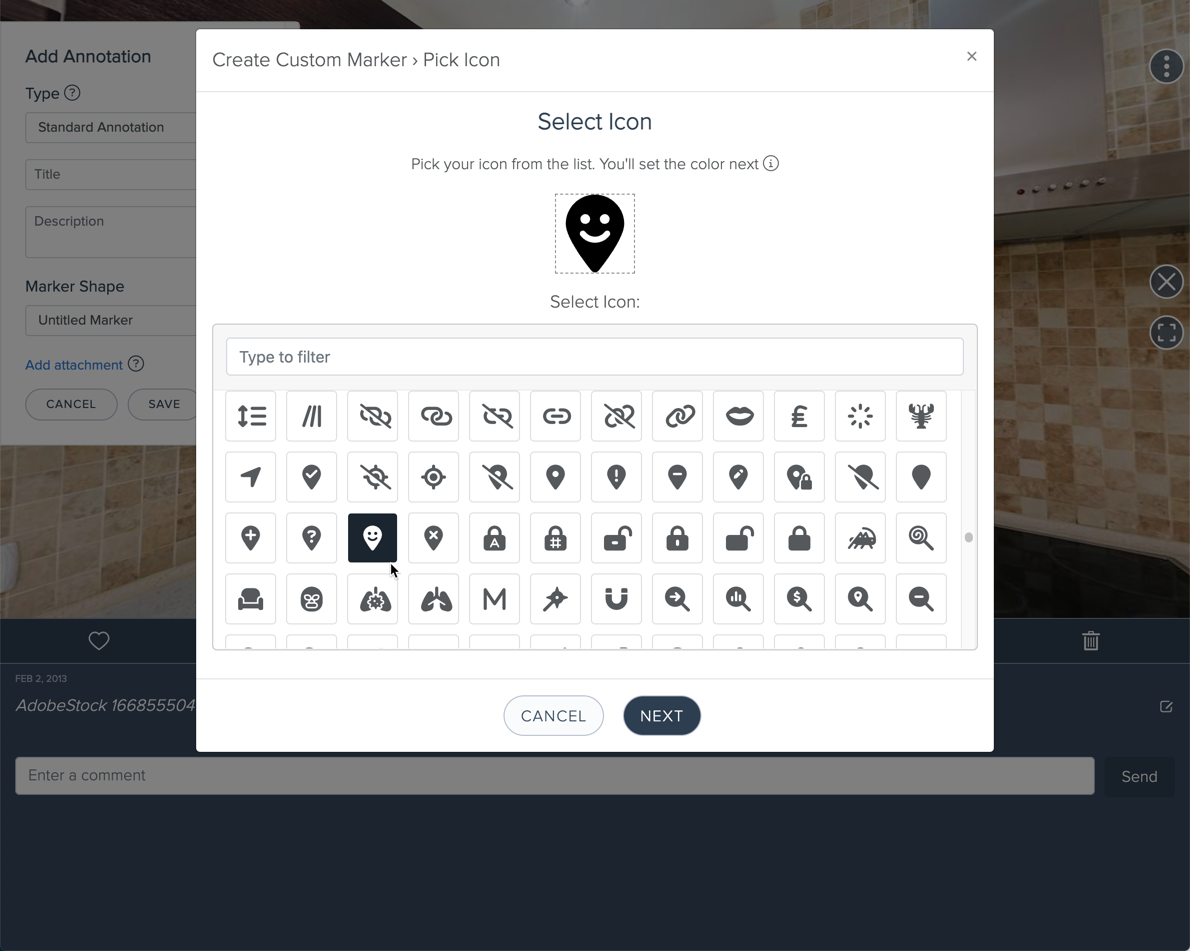
You can also change the icon by selecting another one. When you're ready, click "Next."
If there are icons that you would like us to include that are missing, please let us know (email us at support@momento360.com )
2. Set Colors
Now you'll set the colors you want the icon to be in its different states. The default colors are a starting point, but you can change the colors are you want.
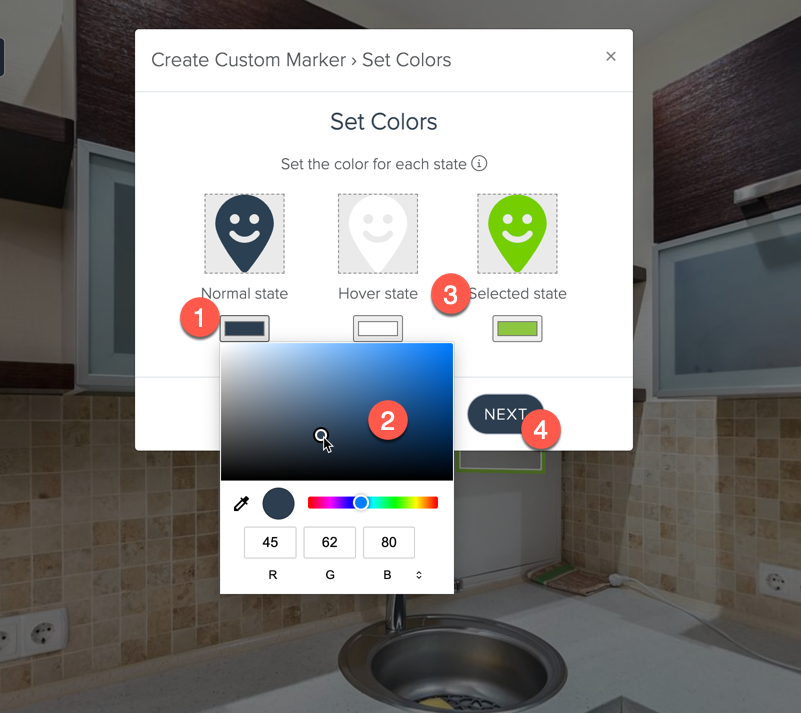
To change the color of an icon:
- Click on the color swatch under the icon image.
- The Color Picker opens. Note that different browsers and operating systems will display this differently, but generally you should be able to set the color in several ways. The icon will change color when you set it.
- When you are satisfied, click outside the color picker on the window itself to close the picker. (Note that clicking outside the modal window closes the entire window and you will have to start over.)
- When satisfied with all the colors, click the Next button.
There will be a wait as the markers are created and saved to your account.
Note: On Firefox browsers this step may fail. We recommend switching to Chrome, Edge, or Safari if this is the case, just for the marker creation.
3. Set Properties
Finally, you will set the custom marker's properties:
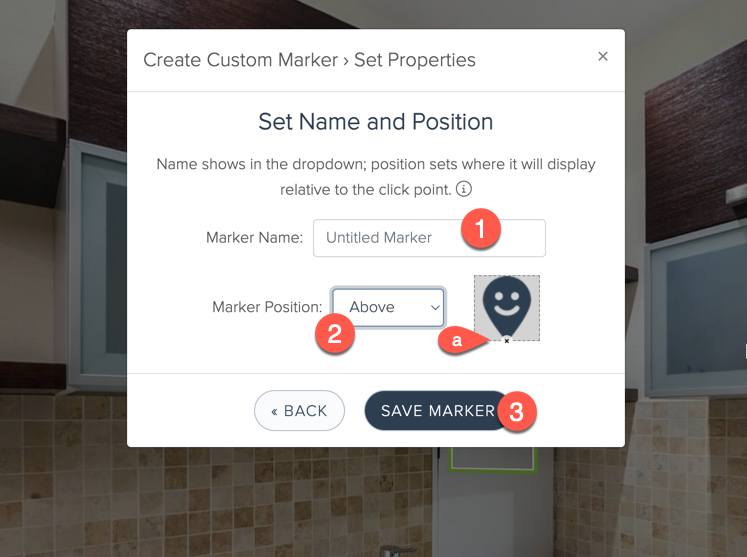
- Set marker name: This is what displays in the Marker dropdown. (Note: Custom Markers are listed alphabetically in the Marker selector dropdown)
- Set marker position relative to click point: This determines where the annotation marker is placed relative to where you click to place the annotation. Some markers make more sense if they are centered over the click point; some markers make more sense if they are placed above (e.g. pushpin) or below (e.g. up arrow) where you click. The default is centered.
- The small circle with an "x" shows the location of the annotation click and where the marker will be positioned relative to that.
- Save Marker: Once you're satisfied, click this to save. You will receive a confirmation that this is now ready to use
Creating Custom Marker via Uploading Images
Adding a marker only requires two steps: Uploading marker images (that you already have) and setting properties.
1. Upload Marker Images
You'll need to have your icon images as either PNG or SVG (PNG is preferred), ideally sized to 512 x 512. Make sure the PNG has a transparent background.
Each marker requires three images, corresponding to what is displayed depending on how viewers interact with the annotation. The images are:
- Normal state: What the annotation looks like when it is not selected nor being hovered over
- Hover state: What the annotation looks like when the viewer is hovering over it (a preview panel appears during this state.)
- Selected state: When the viewer has selected the annotation and its contents are being displayed in the annotation details panel
For example, for a left-arrow icon :
This would translate to the following in an annotation:

Although it is possible to use the same icon image for all three states, this is not recommended as viewers won't be able to tell if your annotation is working or not.
To upload, simply click the "+" field above each or drag each image to its appropriate field. You will optionally be able to crop your uploaded image before you upload it if you wish.
If you want to remove an uploaded image, click the "x" button in the upper right corner of the box:
Once you have all three image uploaded, click "Next."
2. Set Marker Properties
Name: The next step is to set the marker's name. This is what will display in the Marker dropdown. (Note: Custom Markers are listed alphabetically in the Marker selector dropdown)
Position: This determines where the annotation marker is placed relative to where you click to place the annotation. Some markers make more sense if they are centered over the click point; some markers make more sense if they are placed above (e.g. pushpin) or below (e.g. up arrow) where you click. The default is centered.
There is a small circle with an "x" that will show you the location of the annotation click and where the marker will be positioned relative to that. You can always change this later.
Editing an existing marker
You can edit an existing marker from the same locations where you add markers; simply select the "Manage Custom Markers" option.
The existing markers that are there will be displayed on the left in a scrollable panel.
1. Selecting the icon you want to edit in the left panel in order to display its details.
2. Click the "Edit Marker" button. This will bring you into the same steps as the marker creation process, except everything will is already populated.
3. Review/edit images; replace if needed, then click next
4. Make adjustments to the name or marker position
5. Click "Save Marker" to save the changes.
All annotations using that marker will now display using the updated marker.
Deleting a marker
To delete a marker, simply go to the Manage Marker panel, select the marker and click the "Delete Marker" button.
All annotations that use the deleted marker will revert to using the default Annotation marker ("Square"). Deleting a marker does not affect any annotation content.
Using Custom Annotation Markers
In Annotations
To use a Custom Marker in an annotation, simply choose it from the Marker Shape dropdown when creating or editing an annotation. All of your custom markers will be organized under the Custom marker group.
Custom Markers are visible anywhere the annotation is visible: On your own 360s, on share/embed links, as well as Shared 360s.
You can use Custom Markers on any type of Annotation or Hotspot; you can also go back and edit existing annotations to use custom markers; all links and embeds displaying this annotation will display the updated marker immediately.
In Plan Drawings
To use a Custom Marker in Plan Drawings, simply choose it from the Marker Shape dropdown when creating or editing a Marker Placement.
While you the Add/Edit Custom Markers command is not available from the Plan Viewer, all the Custom Markers in your account will be visible in the dropdown.
Note: The interaction states for Custom Markers are the same in Annotations and Plan Drawings; markers are sized slightly smaller when used in Plan Drawings.
Custom Markers and Shared 360s
Any Custom Annotation Markers you create become available on your 360s to anyone you have authorized to annotate a shared 360; e.g. any users with annotation permissions will see the additional custom marker options when they go to choose an annotation marker. (For more information on permissions, see the
Sharing: Permissions Overview)
Note that this only applies to your 360s; recipients of your 360s cannot use your custom markers on their own 360s.
If you are the recipient of a Shared 360, you are currently only limited to the markers in the Basic set and the 360 owner's Custom marker set; you are not able to use your own Custom Markers on a 360 owned by someone else.
Questions
What happens to annotations that have a custom marker if you delete that marker?
All existing annotations with that marker fall back to the default annotation marker (Square).
Why do my icons look stretched and wrong?
The icon images need to be in a 1:1 aspect ratio (e.g. 512 x512). If they aren't, they will get stretched when rendered as an annotation marker. One way to avoid this is to fill in any blank space with transparent pixels.
What image formats can you use for marker images?
Most image formats (jpg, png, gif) are accepted, but we strongly encourage using PNGs. We also accept SVGs but because of the way they are converted into textures when rendered they may not display in the proper aspect ratio (we are planning to remedy this in the future).
One option for converting SVGs into PNGs is to upload them but use the "Crop" tool in the uploader to set the aspect ratio to 1:1; your mileage my vary.
What happens to my custom markers if I downgrade from a Pro or Business account?
All existing annotations with custom markers will remain as they are, however you won't be able to use/access the Custom Markers until you resume either a Professional or Business subscription. Your markers will remain intact in the meantime, however (we won't delete them).
What happens if I share a 360 with someone else?
If that user has the ability to annotate, they will be able to view and use any of your annotation markers on their annotations. To restrict the ability to annotate, see permissions.
Where can I find some icons?
For general-purpose icons we recommend looking at Font Awesome (https://fontawesome.com/); they have a wide range of icons, some for free, and there are sites that will convert them to PNG format.
Have any other questions? Contact support@momento360.com and we'll answer them!


